Setup
Get your Tradeways API key, install the Tradeways module in ATAS, add the indicator to a chart, and choose how broker accounts are routed.
Setup
1. Get your API key from Tradeways
In Tradeways, click Add Trades (top-right) → Auto Sync → ATAS Indicator. A new API key is created for you and shown once — copy it. You can also create one manually in Settings → Integrations.
New keys grant access to all your trading accounts by default, so you don't need to copy any account ID.
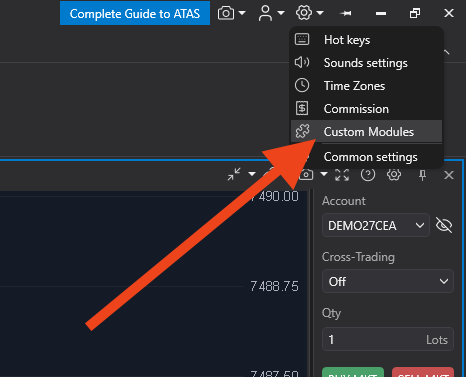
2. Install the Tradeways module in ATAS
Open the ATAS settings menu via the gear icon in the top bar.

Choose Custom Modules from the dropdown.
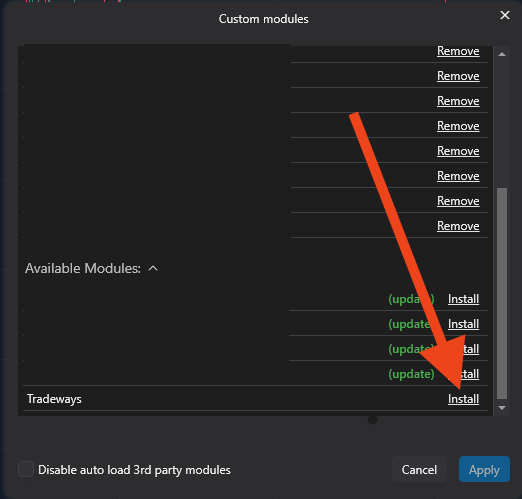
In the Available Modules list, click Install next to Tradeways.
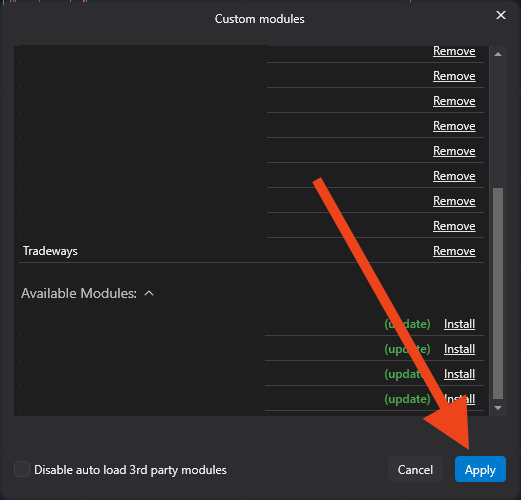
Click Apply to confirm. ATAS will install the module.
3. Add the indicator to a chart
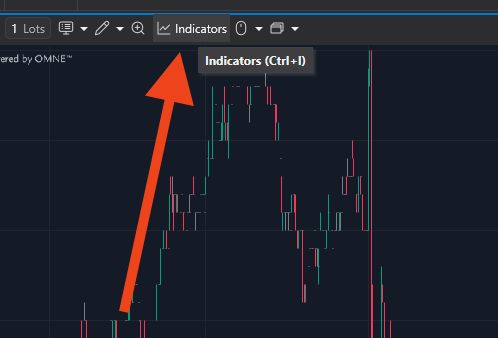
Open any chart and click the Indicators button on the chart toolbar.
Search for Tradeways, paste your API key into the API Key field on the right, then click Add to chart.
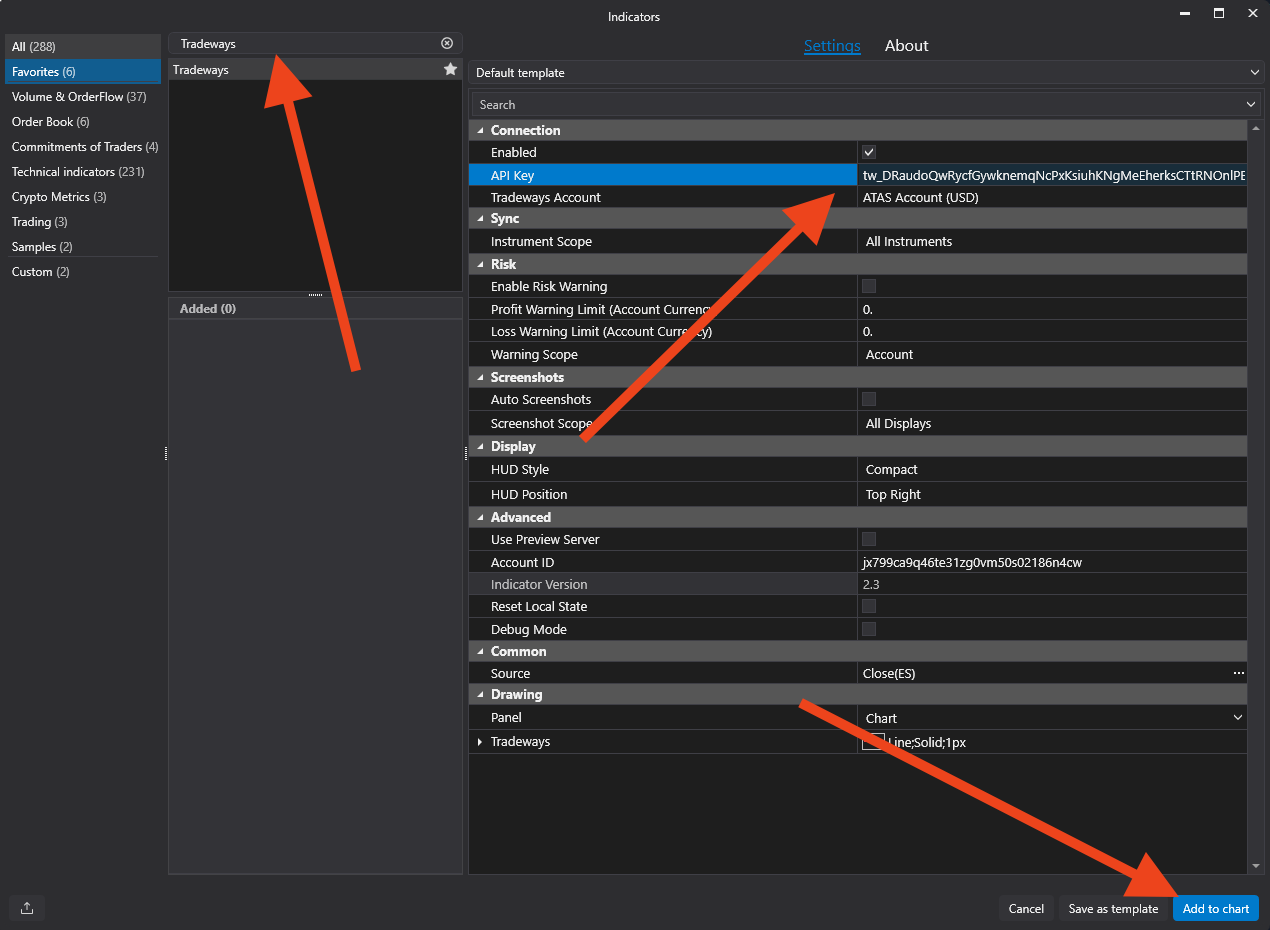
The Tradeways Account dropdown fills automatically from your API key.
4. Choose how trades are routed
The Tradeways Account dropdown has two kinds of entries:
- A specific account — every fill on this chart is journaled to that one Tradeways account, no matter which broker account it came from. Best when one ATAS install maps to one Tradeways account.
- Automatic — separate by account — each broker account you trade is journaled to its own Tradeways account, matched by the broker's account ID. Best when you run several prop or live accounts from one ATAS install. Tradeways creates a destination account the first time it sees a new broker account, then remembers the mapping.
On Automatic, the indicator reports your broker accounts to Tradeways the moment it connects and whenever you switch accounts — so you can pre-assign where each one lands in Settings → Integrations before the first trade arrives. See Connected broker accounts.
That's it — fills now sync to Tradeways in real time. To review every option, see Settings.